
Products
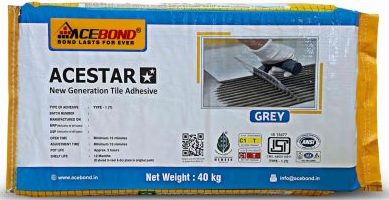
ACESTAR – New Generation Tile Adhesive
Product Lists
- Acescreed Concentrated
- Antirust Coating
- Block Fixing Mortar
- Bonding Agent
- Cementitious Grout
- Cleaner
- Crack Filler
- Enhancer
- Epoxy Adhesive
- Epoxy Coating
- Epoxy grout
- Grouts
- Mould Releasing Agent
- PU Adhesive
- Screed
- Sealers
- Slurry Additive
- Sparkling Series
- Special Adhesive
- Special Admixture
- Thickbed Mortar
- Thin Set Adhesive
- Tile Adhesive
- Tiles and Stone care
- Wall Care
- Waterproofing
Polymer based economy adhesive for fixing ceramic tiles and small format vitrified tiles on dry areas of interior applications. It’s unique blend of cement, silica, polymers and additives gives excellent bonding between tile and substrates for most demanding installation requirements.
- Economy grade, cost efficient
- Superior quality, Easy to fix
- Single component, just add water
- Bonds to various substrates
- Complies with EN/ISO with C1T classification
- Exceeds IS 15477:2019 – Type 1T Adhesive standards
- Suitable for fixing up to 2ftX2ft vitrified tiles for floors and 1ftX1ft ceramic tiles for walls.
Surface must be structurally strong. Remove all grease, oil, dirt, curing compounds, sealers, adhesives or any other contaminant that would prevent good bonding. Glossy or painted surfaces must be sanded, or abraded, and stripped off all contaminants. Concrete or plaster must be cured 28 days prior to bonding unless it is made with Acescreed. Concrete must be free of efflorescence and not subject to hydro static pressure. Concrete slabs should have a course finish to enhance the bond. Roughen the surface by sanding or abrading, then rinse and allow to dry. Expansion joints should never be bridged with setting material. Surface temperature should be maintained above 10°C or below 38 °C to achieve proper bond.
ACESTAR- New Generation Tile Adhesive is a single-component polymer based economy adhesive ideal for interior applications, particularly for fixing ceramic tiles and small format vitrified tiles on various cement-based substrates.Can be used up to maximum 15 mm bed thickness.
Use 4.5 L of water for 20 kg powder. Take water in a 20 L clean pail and pour powder slowly to the pail under slow mixing. Mix by hand or use a low speed frill mixer(150-200 rpm speed) to achieve a smooth, paste like consistency. Let the homogeneously mixed adhesive mixture slake or stand 5 – 10 minutes, stir again and use. Stir occasionally, but do not add more water. When properly mixed, troweled ridges will stand without slump.
Use a required size notch trowel to ensure proper coverage under tiles. Using the flat side of the trowel, apply a skim coat of mortar to the surface. With the help of properly notched or teeth side of the trowel held at 45° angle, apply additional mortar to the surface, combing in one direction. Press the tile firmly into place in a perpendicular motion across ridges, moving back and forth. The perpendicular motion flattens ridges and closes valleys, allowing maximum coverage. With some tile, back – buttering is advisable. Adjust the tile promptly and beat it in with a beating block and rubber mallet. Periodically pull up a tile and check the back to ensure proper adhesive coverage. If the material has skinned over, recomb with the notch trowel. If too dry, remove and replace the dry material with fresh material. Material in the bucket will remain workable for approximately 3 – 4 hours.
Grouting can be done after 24 hours of installation of tiles. Use Acegrout superfine series grout for up to 5 mm joints and Acegrout coarse series grout 3 – 12 mm joints. Use Acepoxy Epoxy grout for stain and chemical resistance, hygienic grout. Please call customer service executive for more information.

